Office IT infrastructure planning in 2025 goes beyond cables and routers it’s the foundation of business continuity.
A complete setup includes structured cabling, secure communication racks, dedicated power and UPS systems, and well-designed Wi-Fi coverage.
By planning early, documenting everything, and aligning IT with workspace design, businesses reduce downtime, improve performance, and future-proof their operations.
Introduction | Why IT Planning Matters
When a company plans to move into a new office, IT is often the last thing people think about. Yet it’s the first system everyone depends on the moment they walk in. Without structured cabling, reliable power, and a well-organized communication rack, even the most beautiful office will grind to a halt.
Strong IT planning is what separates a smooth transition from chaos. It ensures your internet is live on day one, your Wi-Fi covers every corner, your network points are clearly labeled, and your communication rack stays cool, secure, and stable. This isn’t just about technology it’s about business continuity. Downtime equals lost revenue, frustrated teams, and delayed operations.
A proper IT plan should start early ideally before the interior design phase. That’s when you can align electrical layouts, cabling routes, and communication rooms. It’s also the time to decide how many users you’ll support, how your network will scale, and how you’ll protect your systems. When IT joins the discussion at the right stage, you avoid retrofits, exposed cables, and last-minute improvisation that leads to long-term problems.
Think of this as building a foundation. Every outlet, switch, cable, and UPS becomes part of your company’s nervous system. If one piece fails, everything connected to it suffers. But when the plan is right, the whole operation runs effortlessly fast, secure, and ready for growth.
Checklist | IT Planning Essential
Begin IT planning before construction or renovation starts
Confirm where network racks, power outlets, and cabling routes will go
Involve your IT vendor early to coordinate with electricians and designers
Estimate how many devices, users, and Wi-Fi zones you’ll need
Choose a structured cabling standard (Cat6 or Cat6A) before ordering materials
Plan for future expansion at least 20–30% spare capacity
Prepare an initial network diagram showing all communication rooms and access points
Document every decision in one shared folder
💡 Gold Tip
Bring your IT integrator to the first site visit, not the last.
They’ll see problems the architect won’t+ and their input can save you weeks of delays and thousands in hidden costs.
The table below provides a concise summary of every critical component in a modern office IT infrastructure.
It highlights each category, its key elements, and their purpose in ensuring a secure, efficient, and future-ready environment.
Use it as a quick-reference checklist when planning, auditing, or upgrading your organization’s IT systems.
| Category | Component / Item | Description |
|---|---|---|
| Planning & Design | Early IT Planning | Begin before construction to align power, cabling, and workspace layouts. Document every step and plan for scalability. |
| Pre-Lease Assessment | Office Space Evaluation | Confirm fiber availability, electrical capacity, cooling, and physical space for communication racks before signing. |
| Cabling & Connectivity | Structured Cabling (Cat6/Cat6A) | Use certified cables, keep data and power lines separated, and request official test reports after installation. |
| Network Equipment | Managed & PoE Switches | Deploy managed switches with VLAN and QoS support. Use PoE for cameras and access points. Leave 20–30% spare capacity. |
| Power & UPS Systems | Power Distribution & Backup | Protect critical equipment with UPS and PDUs. Test load annually and replace batteries every 2–3 years. |
| Communication Rack | Rack Setup & Security | Maintain organized cabling, proper ventilation, and physical security. Document layout and lock access. |
| Wi-Fi Network | Wireless Coverage & Segmentation | Perform a Wi-Fi site survey. Separate guest, IoT, and corporate networks via VLANs. Use Wi-Fi 6/6E APs. |
| Security & Access Control | Network & Physical Security | Lock racks, enforce MFA, segment networks, and maintain admin password management with periodic access reviews. |
| Documentation | Network Maps & Photos | Maintain visual and written documentation of racks, ports, and configurations. Store securely in the cloud. |
| Maintenance | Preventive & Future Readiness | Review logs quarterly, clean airflow, apply firmware updates monthly, and maintain 20–30% system capacity. |
| Final Checklist | Move-In Verification | Test all connections, Wi-Fi coverage, UPS performance, and internet redundancy before going live. |
Choosing the Right Office Space for IT Reliability
The location you choose defines how easy or painful your IT setup will be. Many offices look great in design renderings but are a nightmare for connectivity. Walls that block Wi-Fi signals, ceilings that can’t support cabling, or server rooms squeezed into storage closets these are the hidden problems that cause downtime, overheating, and endless technician visits.
When evaluating a new office, look beyond price and aesthetics. Ask yourself: can this space support a secure, stable, and scalable IT environment? The goal isn’t just to fit desks it’s to create a foundation where technology works without interruption. Your power, cabling, ventilation, and internet availability must align with your operational needs from day one.
A professional assessment should include both infrastructure and capacity. Is there fiber internet in the building? Is there a clear route for data cables? Is there a separate electrical line for IT equipment and UPS systems? How much cooling can the server area handle? These aren’t details they’re the difference between a high-performing workspace and a constant headache.
Always involve your IT consultant or system integrator before signing the lease. They can review blueprints, test connectivity, and verify the placement of electrical and communication conduits. They’ll also check that you can expand later because offices grow, and re-cabling a finished space costs far more than preparing for growth now.

Checklist | Pre-Lease IT Assessment
Confirm fiber or high-speed ISP availability in the building
Verify access to power circuits dedicated for IT equipment
Check ceiling and wall access for structured cabling routes
Ensure there’s space for a communication rack or small server room
Validate cooling and ventilation options for IT areas
Identify backup power options (UPS, generator, or dual supply)
Inspect where access points, cameras, and network points will be installed
Ask the landlord about modification permissions for wiring and drilling
Get your IT vendor’s written confirmation before signing the lease
💡 Gold Tip
Never assume the office has “good internet” test it.
A five-minute bandwidth test and a quick inspection of the building’s fiber line can reveal what marketing brochures never will.
Planning Network Socket
Network planning is where the technical side meets the practical reality of how your team works. Many offices end up with tangled cables, weak Wi-Fi, and crowded outlets simply because no one mapped how people, furniture, and devices would connect. Good IT design starts with understanding your workspace where people sit, how they collaborate, and what equipment they’ll actually use.
Each workstation should have a dedicated data outlet and a nearby power source. That means no extension cords running under desks and no shared sockets between computers and kitchen appliances. Printers, meeting rooms, IP phones, and security cameras all need their own network points too. Skipping these small details often leads to patchwork fixes, poor signal quality, and safety hazards.
Planning should include the full life cycle of your office not just what you need today. A well-built network allows for at least 20–30% spare capacity, so when you add new staff or devices, you don’t need to rebuild the system. The same applies to Wi-Fi access points and ceiling cabling install them now, not later. A few extra points cost little during construction but save thousands in future upgrades.
Finally, document every point in a shared floor plan or spreadsheet. Label network outlets logically (e.g., Reception-01, Finance-02) and match them to their location in the communication rack. When something goes wrong, you’ll be able to trace and fix it in minutes instead of hours.

Checklist | Network and Power Layout
Map every desk, meeting room, printer, and camera location before installation
Place network and power outlets side by side at every workstation
Add extra points for Wi-Fi access points and smart devices
Plan for 20–30% spare outlets and switch ports for growth
Avoid placing outlets near water, heat, or heavy electrical lines
Label every outlet clearly and document in a shared file
Verify outlet height, location, and cable path with both the IT and electrical teams
Keep at least one dedicated power circuit for the communication rack
💡 Gold Tip
Always plan for the unplugged moment.
Someone will move a desk, add a screen, or need power where it doesn’t exist — your future self will thank you for every extra outlet you added today.
Structured Cabling Essentials
Your office cabling is more than just wires in the wall it’s the nervous system of your business. Every email, call, and transaction depends on how well it’s installed. Yet most companies still treat cabling as a low-priority task, handing it to the cheapest vendor or doing it last minute. That decision can cost years of headaches. Poor cabling leads to data loss, interference, downtime, and overheating in your rack.
A proper structured cabling system starts with planning. Choose a recognized standard such as Cat6 or Cat6A, depending on your bandwidth and PoE requirements. Cat6A supports higher speeds and longer runs, making it a safer long-term choice for modern offices with video conferencing, IP cameras, and cloud applications. Keep cable runs below 90 meters and avoid sharp bends or tight bundles that restrict airflow.
Cable routing must be organized. Network and electrical lines should never share the same conduit. Data cables should run through separate trays or ducts to prevent electromagnetic interference. At the rack, use patch panels, cable managers, and clear labeling on both ends. It keeps everything serviceable and prevents confusion when adding or replacing equipment.
Always demand certified testing after installation not a verbal “it works.” Your vendor should provide full test reports (Fluke or equivalent) confirming signal integrity and compliance with standards. Keep those reports stored with your office documentation; they’re your warranty that the system was built correctly.
Finally, never compromise on neatness. Clean cabling equals efficient maintenance. A tidy rack isn’t about looks it’s about airflow, reliability, and safety.
Checklist | Structured Cabling Quality
Select Cat6 or Cat6A cables from certified manufacturers
Keep data and electrical lines fully separated
Use patch panels, cable trays, and proper labeling at both ends
Limit cable runs to 90 meters or less
Avoid tight bends, excessive ties, or pressure points
Request certified Fluke or equivalent test reports
Leave spare conduits for future expansion
Ensure rack cabling is clean, organized, and easy to trace
💡 Gold Tip
Never accept a cabling job without test results.
A simple report proves signal quality, PoE readiness, and performance it’s your insurance policy for every connection in your office.
Communication Rack and Server Room
Your communication rack is the heart of your entire IT setup. Every connection, every cable, and every device in your network runs through this single point. When it’s designed right, everything flows smoothly. When it’s done poorly, you get overheating, dropped connections, and chaos that costs you time and money.
The rack must be treated as mission-critical equipment. Start by choosing the right size most small and mid-size offices require a 24U or 42U rack, depending on how many switches, patch panels, and power units you’ll install. Always plan for growth: reserve at least 20–30% free space for future expansion. Overcrowding leads to poor airflow and difficulty performing maintenance.
Cooling and ventilation are often overlooked but essential. A rack packed with PoE switches and routers generates significant heat. Make sure it has front and rear ventilation or install rack-mounted fans. If the room lacks air conditioning, add a dedicated cooling unit or venting duct. Consistent temperature and humidity prevent equipment failure and extend lifespan.
Power should come through a dedicated circuit protected by a UPS. Install a PDU (Power Distribution Unit) inside the rack to manage multiple devices safely. Keep cables short and neatly routed; patch cords should not hang or block airflow. Use Velcro straps instead of zip ties to avoid damaging cables during future maintenance.
Security is just as important as performance. The rack must be locked, ideally located in a restricted area, and accessible only to authorized IT staff. Add a small camera or access log system if sensitive data or core systems are stored there. Document the exact layout —what’s installed where and take a clear photo of the rack once everything is in place. It will be invaluable during troubleshooting or audits.

Checklist | Rack and Server Room Essentials
Choose a rack with 20–30% spare capacity
Ensure front and rear airflow or install rack fans
Keep rack cables short, neat, and organized
Use Velcro straps instead of permanent ties
Install a UPS and PDU with surge protection
Provide dedicated electrical and cooling circuits
Lock the rack and limit access to authorized staff
Take photos and document the layout after installation
💡 Gold Tip
Treat your communication rack like a data center even if it’s just one cabinet.
A clean, locked, and well-ventilated rack isn’t a luxury; it’s the difference between stability and constant downtime.
Power and UPS Planning
Power stability is the hidden foundation of every reliable IT setup. You can invest in the best servers, switches, and cabling but if the power isn’t clean or consistent, none of it matters. A single power surge or short outage can damage equipment, interrupt operations, and corrupt data. That’s why proper power planning and UPS protection aren’t optional they’re essential.
Start by identifying which devices must stay on during an outage. In most offices, that includes your main router or firewall, core network switch, and possibly a local server or NAS. These are your business lifelines. Everything else — monitors, printers, or personal devices can go down temporarily without hurting operations. Once you know your critical load, add up their power consumption (in watts) and choose a UPS that can handle at least 25–30% more than that total. That margin ensures stability and gives room for future growth.
Next, consider how long you need backup power. A small office may only need five to ten minutes to shut down systems safely. A larger operation or one hosting on-site servers might require 30 minutes or more. For most SMBs, a Line-Interactive UPS provides sufficient protection. For communication racks or small server rooms, go with an Online (Double Conversion) UPS it delivers continuous, clean power with zero switching delay.
Your UPS should connect through a dedicated power circuit, ideally separated from general office outlets. Inside the rack, use a PDU (Power Distribution Unit) to distribute power evenly and prevent overloads. Make sure batteries are easily replaceable and schedule annual testing. A UPS isn’t “set and forget” its batteries degrade over time and must be inspected regularly.
Finally, don’t ignore power quality. In older buildings, voltage drops and electrical noise can cause random restarts or slowdowns. Surge protectors and power conditioning units help stabilize voltage and protect sensitive devices.
Checklist | Power and UPS Essentials
Identify critical devices that need continuous power
Add total power load and include a 25–30% capacity buffer
Choose Line-Interactive UPS for desktops, Online UPS for racks or servers
Connect UPS to a dedicated electrical circuit
Install a PDU for controlled power distribution
Replace UPS batteries every 2–3 years
Test UPS performance at least once a year
Use surge protectors or voltage regulators in older buildings
💡 Gold Tip
Don’t find out your UPS doesn’t work during a blackout test it.
Unplug it once a year for ten minutes and see what stays on. That’s the moment you’ll know if your protection is real or just a false sense of security.
Network Equipment and Switches
Your network equipment is where performance and reliability truly begin. The cabling may be your foundation, but the switches, routers, and firewalls are the brain that keeps everything running. Choosing the wrong hardware or skipping proper planning here creates the bottlenecks, random disconnections, and slow speeds that users immediately feel.
Start by sizing your network. Count how many endpoints you’ll have computers, VoIP phones, cameras, Wi-Fi access points, printers, and IoT devices. Then separate them into two categories: PoE devices (those that draw power from the network, like cameras or access points) and standard data devices (computers, printers, servers). This helps determine how many PoE and non-PoE switches you need.
For most small to medium offices, it’s smart to dedicate one or two PoE switches for powered devices and use regular managed switches for data. Managed switches are critical they allow you to create VLANs, monitor performance, and remotely manage or reboot ports. Unmanaged switches may save money up front but cost far more in downtime and troubleshooting later. Always choose switches with at least 10Gb uplinks between them to prevent bottlenecks.
The core of your network should have a distribution or core switch that connects all other switches together. This is where inter-VLAN routing, quality of service (QoS), and access control lists (ACLs) are configured. The firewall or router should connect directly to this core, serving as your gateway to the internet while filtering threats and enforcing security policies.
When purchasing equipment, look for enterprise-grade brands known for stability and long-term support Cisco, HPE Aruba, Fortinet, or Ubiquiti. Avoid consumer hardware meant for home use; it won’t handle corporate traffic loads or multiuser access reliably.
Finally, think about growth. Always leave at least 20–30% spare ports available on each switch and rack space for new units. Expanding without downtime should be part of your initial design, not an afterthought.

Checklist | Network Equipment Planning
Count all devices and separate PoE from standard data endpoints
Use managed switches with VLAN and remote management features
Dedicate PoE switches for cameras, phones, and Wi-Fi access points
Provide 10Gb uplinks between switches to avoid bottlenecks
Install a core or distribution switch for routing and QoS control
Connect the firewall directly to the core switch
Use enterprise-grade hardware with long-term vendor support
Leave 20–30% spare ports for future expansion
💡 Gold Tip
Never max out your switches on day one.
Leaving just a few empty ports today can save you from a full network redesign tomorrow scalability is the cheapest insurance you’ll ever buy.
Wi-Fi and Wireless Network Setup
A reliable Wi-Fi network is no longer a luxury it’s an expectation. Employees, guests, and connected devices all depend on seamless wireless coverage to stay productive. Yet most offices still treat Wi-Fi as an afterthought, installing a few access points wherever it’s convenient. The result: dead zones, dropped calls, and constant “Why is the internet slow again?” moments. Proper wireless planning transforms that chaos into stability.
The first step is to plan coverage, not placement. A strong Wi-Fi signal on paper doesn’t mean consistent connectivity in reality. Every office has walls, glass partitions, and furniture that weaken signal strength. Conducting a Wi-Fi site survey even a simple one using free mapping tools shows where access points should be mounted for full, even coverage. For most offices, ceiling-mounted access points provide the best range and performance.
Next, design your wireless network with structure. Separate your internal corporate Wi-Fi from your guest network and any IoT devices. This is done through VLANs or separate SSIDs, ensuring guests can access the internet without touching internal systems. Each network should have a clear name, strong password policy, and centralized management for monitoring and updates.
Modern standards matter too. Choose Wi-Fi 6 or Wi-Fi 6E access points they handle higher device density and offer better power efficiency for mobile devices. Older access points might still work, but they won’t deliver the speed or reliability your team expects. Always connect each access point to a PoE switch with enough power budget to prevent drops during peak usage.
Finally, manage your Wi-Fi like any other business system. Update firmware regularly, check signal performance every few months, and keep your configuration backed up. If your network supports cloud management, use it remote monitoring can detect issues before users even notice them.

Checklist | Building a Reliable Wi-Fi Network
Perform a Wi-Fi site survey before installing access points
Mount access points on the ceiling for optimal coverage
Separate internal, guest, and IoT networks with VLANs or SSIDs
Use Wi-Fi 6 or Wi-Fi 6E access points for better performance
Connect each access point to a PoE switch with proper power budget
Implement strong password and encryption policies (WPA3 recommended)
Update firmware and monitor signal health regularly
Document Wi-Fi locations and network settings in your IT folder
💡 Gold Tip
Install one extra access point now — not later.
Adding coverage after the office is full costs ten times more than planning it right the first time. A single AP can be the difference between flawless meetings and constant frustration.
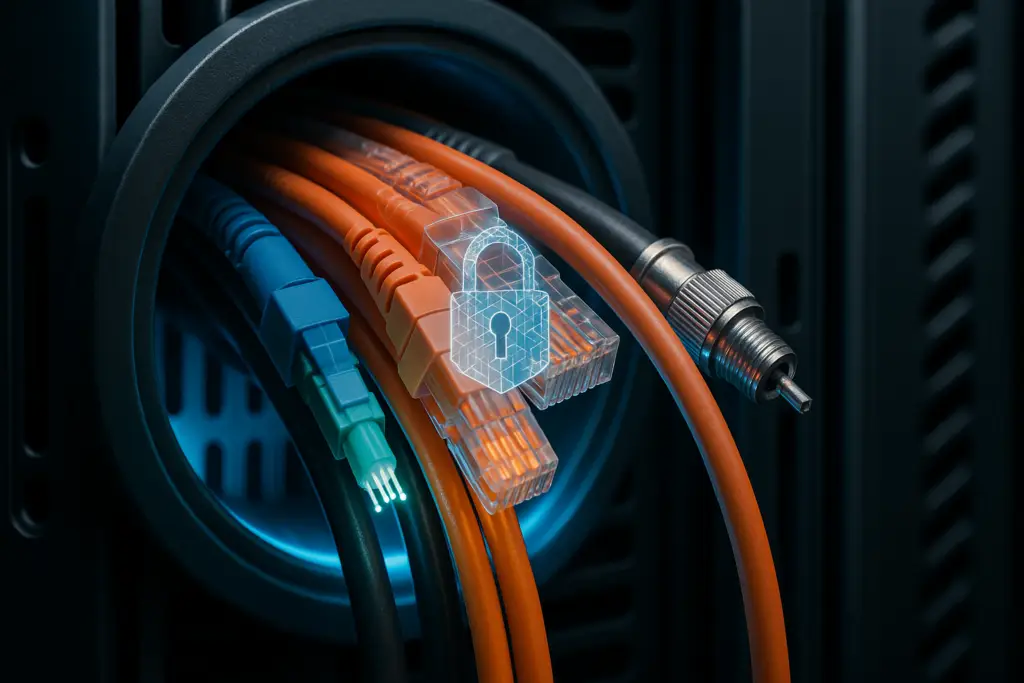
Security and Access Control
Every modern office runs on connectivity but with connectivity comes exposure. Physical and digital security must go hand in hand. A single unlocked server rack, shared admin password, or unsegmented network can compromise your entire operation. The goal of IT security in an office environment is not to make life difficult for users it’s to keep control, visibility, and accountability over everything connected.
Start with the basics: physical access control. Your communication rack, server room, and network equipment must be locked at all times. Only authorized IT staff or integrators should have keys or badge access. Install a small camera or access log system if the room hosts critical systems. A locked rack and a simple camera are far cheaper than a single data breach.
Next, focus on network segmentation. Not every device or user should share the same network. Separate your core business network, guest Wi-Fi, and IoT devices into different VLANs or subnets. This limits exposure and keeps sensitive systems isolated. Even if an attacker gains access to one network, they can’t move freely between others.
Administrative control is just as important. Change default passwords on all devices, including routers, switches, and access points. Maintain a centralized password vault or management tool and define who can make configuration changes. Use role-based permissions so no single user has full control over everything. Enable multi-factor authentication (MFA) wherever possible especially for remote management portals or VPNs.
Finally, establish a simple backup and recovery plan. Every business should back up configurations, data, and critical files both locally and in the cloud. Test your backup once every few months. Backups are not security — they are resilience, your insurance against human error or ransomware.

Checklist | IT Security and Access Control
Keep all communication racks and server rooms locked
Limit access to authorized IT personnel only
Install cameras or logging systems in sensitive areas
Segment networks (Corporate, Guest, IoT) into separate VLANs
Change all default admin passwords and store them securely
Use MFA for VPN, admin consoles, and remote access
Maintain regular backups of data and configurations
Review access permissions quarterly
💡 Gold Tip
Security isn’t about trusting people it’s about trusting systems.
When you lock the rack, segment the network, and protect admin access, you remove human error from the equation and that’s where true reliability begins.
What Offices Usually Forget
Even the most organized office projects miss critical details. Everyone focuses on furniture, colors, and schedules but the invisible infrastructure often gets overlooked. When IT isn’t fully included in the move plan, small oversights become major problems: no Wi-Fi in meeting rooms, racks overheating, or cables that stop two meters short of where they’re needed. These are the mistakes that waste time, money, and trust.
One of the most common failures is underestimating cable routes and capacity. Many offices run just enough cabling for current desks, forgetting that people move, teams grow, and devices multiply. Always plan at least 20–30% extra outlets and conduits. It’s far cheaper to add them during construction than after walls are painted.
Another recurring issue is power placement. Network outlets and power sockets often end up on opposite walls, creating unsafe cable runs and messy extensions. Each workstation should have a paired power and data point within easy reach. Meeting rooms also need multiple power sources for screens and video equipment not just one socket under the table.
Cooling and ventilation also get ignored. A communication rack in a closed cabinet or a storage room without airflow quickly overheats. Heat shortens hardware lifespan and causes random outages that are difficult to diagnose.
And then there’s documentation or rather, the lack of it. After the installation team leaves, no one knows which port connects where. Without a clear as-built diagram or photo of the rack, even a minor change becomes a two-hour hunt.
Finally, internet provisioning is often delayed. Many businesses assume connectivity will be ready on move-in day, only to discover the ISP needs two more weeks. Order your internet line at least a month before relocation. Always verify the physical line, the router configuration, and the public IP details before moving in.

Checklist | Common Oversights to Avoid
Forgetting extra conduits or cable routes for expansion
Misaligned power and data outlets at workstations
No ceiling cabling for Wi-Fi or security cameras
Communication rack placed in an unventilated room
Missing patch cords or labeling after installation
Late ISP activation or lack of backup internet
No maintenance or service contract post-installation
Zero documentation or port mapping
💡 Gold Tip
Your future IT problems are hiding in the things you didn’t double-check today.
Walk the site once more before move-in, with your IT provider not the designer and you’ll fix 90% of tomorrow’s issues before they ever happen.
Testing and Documentation
Once the cables are in, the rack is assembled, and the Wi-Fi is live, most teams rush to move in. But that’s exactly when the real work should begin testing and documentation. A few hours of validation now can save weeks of confusion later. IT systems don’t fail because of big mistakes; they fail because no one stopped to check the small things.
Every network point, cable, and device must be verified before employees arrive. Plug a laptop into each data outlet and confirm connectivity. Test internet speed and latency from different areas of the office to make sure Wi-Fi coverage is consistent. Simulate a short power outage to see if your UPS keeps core devices alive. If you have cameras or VoIP phones, test them individually don’t assume they’re working just because the lights are on.
Documentation is the second half of reliability. Without it, even the best installation turns into chaos when something breaks. Keep a clear record of your setup: the floor plan, rack layout, cable labeling, and network diagrams. Store configuration files for firewalls, switches, and access points in a secure cloud folder. Every detail you document now is a problem solved later.
Photos are also part of documentation. Take clear, well-lit pictures of the rack, cable trays, and power distribution. Include labels in the frame so they can be read remotely. These visuals are invaluable when a remote technician or new IT provider needs to understand your setup without being onsite.
Finally, test again a week after move-in. The first few days of real-world use always reveal small gaps weak Wi-Fi spots, mislabeled ports, or overloaded power lines. Fix them immediately and update your documentation to reflect every change. A system that’s tested, photographed, and documented is a system you can rely on.
Checklist | IT Testing and Documentation
Test every data outlet with a live connection
Verify Wi-Fi signal and speed across all rooms
Simulate a short power loss to test UPS runtime
Confirm camera and VoIP connections individually
Document network diagrams, cable maps, and device settings
Take photos of rack and cabling for reference
Store all documentation in a secure shared location
Retest and update documentation one week after move-in
💡 Gold Tip
Treat your documentation as part of your infrastructure not an afterthought.
Cables and switches can be replaced, but knowledge lost to poor documentation is gone forever.
Maintenance and Future Readiness
Building a solid IT infrastructure is only half the job. The real test of a successful setup is how well it performs six months, a year, or even three years later. Without structured maintenance, even the best system will slowly degrade cables loosen, UPS batteries fail, and configurations drift away from their original design. Ongoing maintenance is what keeps your network clean, predictable, and secure.
Start with a maintenance schedule. Just like cars need servicing, your IT environment needs regular checks. Every quarter, review switch and firewall logs for errors or alerts. Inspect the rack for dust buildup or blocked airflow. Check that fans are running and that cables haven’t been pulled loose during cleaning or upgrades. If your system includes a UPS, test it under load at least once a year and replace batteries every two to three years.
Security updates are another pillar of maintenance. Firmware and operating system patches often fix vulnerabilities that attackers exploit. Schedule monthly updates for all devices routers, switches, Wi-Fi access points, and servers. If you use cloud-managed systems, enable automatic alerts for available updates.
Future readiness means planning for growth before it happens. Keep at least 20–30% spare capacity in power, switch ports, and rack space. Review your cabling diagram whenever new desks or devices are added. Document every change, no matter how small. Over time, these records become your roadmap for upgrades and troubleshooting.
Finally, audit your environment annually. Check performance metrics like bandwidth, latency, and uptime. Review access permissions and user roles to ensure only current employees have network access. Update your disaster recovery plan and confirm that backups are running successfully. A small investment in routine checks today prevents major outages tomorrow.

Checklist | Maintenance and Readiness Routine
Review network logs and rack condition quarterly
Clean ventilation filters and ensure proper airflow
Test UPS load and replace batteries every 2–3 years
Apply firmware and security updates monthly
Keep 20–30% spare capacity for expansion
Update cabling maps after any office change
Audit performance and access permissions yearly
Verify backups and recovery processes regularly
💡 Gold Tip
Maintenance isn’t about fixing problems it’s about preventing them.
A one-hour quarterly review keeps your IT running smoother than any emergency call ever will.
The Final Office IT Readiness Checklist
By now, your office network should be more than just connected it should be organized, documented, and ready to scale. But before you call the move complete, take one last step: verify everything. This final checklist ensures that every outlet, cable, and device works exactly as planned, and that your team can start operating on day one without interruptions.
This isn’t just about testing it’s about ownership. Once you mark these boxes, you confirm that your IT setup is stable, secure, and fully operational. No missing cables, no “we’ll fix it later.” The small effort you invest here saves you from endless troubleshooting after move-in day.
Walk through the site with your IT vendor or integrator. Check every workstation, meeting room, and equipment area. Make sure your communication rack is neat, labeled, and locked. Test the Wi-Fi coverage, verify internet performance, and confirm that all backups and power systems are functioning as designed. Take final photos of the setup for documentation, and store all reports and diagrams in a single shared location.
Once you’ve completed this checklist, your infrastructure is ready not just for today but for years of smooth, secure operation.
Office IT Readiness Checklist
☑ Internet connection installed, tested, and documented
☑ Communication rack powered, ventilated, and locked
☑ All cables labeled and tested with certification reports
☑ Network and power outlets aligned and verified
☑ UPS and PDU tested under load
☑ Wi-Fi coverage checked across all rooms
☑ Backup internet or cellular failover confirmed
☑ Switches, firewalls, and APs configured and updated
☑ Data backed up locally and to the cloud
☑ Documentation stored in a secure shared folder
☑ Access permissions reviewed and MFA enabled
☑ Maintenance plan scheduled and responsibility assigned
💡 Gold Tip
Don’t celebrate the move-in celebrate the first stable week.
When your office runs for seven days straight with zero downtime, that’s when you know your infrastructure isn’t just installed it’s engineered for success.
Summary, Action, and References
Building an office IT infrastructure is not just about connecting cables it’s about connecting people, performance, and productivity.
Every section of this guide was designed to help you think ahead: to plan smarter, build cleaner, and operate with confidence.
From structured cabling to UPS systems, from Wi-Fi design to security and documentation each decision shapes how your business runs every day. IT isn’t just another department; it’s the foundation that supports your entire operation. When it’s designed right, you stop reacting to problems and start focusing on growth.
Your office technology should serve you quietly in the background stable, efficient, and invisible. That’s the true sign of professional infrastructure: when everything simply works.
Next Steps
Audit your current setup | Use this guide as a benchmark. Identify weak points before they turn into downtime.
Document everything | Keep all network maps, photos, and configurations organized and updated.
Schedule regular reviews | Once a quarter, revisit your setup IT systems evolve, and so should your maintenance plan.
Engage experts early | Whether expanding or relocating, involve your IT partner from day one.
Stay future-ready | Plan capacity, security, and scalability before they’re needed not after.
Gold Tip From the Field
The best IT systems are the ones you never have to think about.
If you walk into your office every morning and nothing needs fixing that’s success. Keep it that way through planning, discipline, and proactive care.

Proper IT planning ensures that power, cabling, and connectivity are aligned with business operations from day one preventing downtime and costly retrofits later.
IT discussions should start during the early design phase, ideally before construction begins. This allows coordination between IT vendors, electricians, and architects.
Use Cat6 or Cat6A structured cabling, depending on bandwidth and PoE needs. Cat6A supports higher data rates and is ideal for Wi-Fi 6 and video conferencing systems.
By planning early, using standardized cabling, and leaving 20–30% spare capacity, SMBs avoid future rework and reduce long-term infrastructure costs.
The communication rack is the central hub of your office network hosting switches, patch panels, UPS systems, and routers. A clean, ventilated rack ensures reliability and uptime.
Perform a Wi-Fi site survey before installation. Mount access points on ceilings, separate corporate and guest networks via VLANs, and use Wi-Fi 6/6E access points for better performance.
Skipping extra outlets, underestimating cable routes, poor ventilation in the server area, and lack of documentation are the most frequent and costly oversights.
Perform quarterly maintenance reviews, test UPS batteries annually, and update firmware monthly. Preventive maintenance ensures long-term performance and reduces failures.
References
Remote Hands & Eyes: The Backbone of Modern Data Center Management – hyenetworks
15 Tips on Creating the Perfect Office For Your Business – freeofficefinder
How to wire an Ethernet wall socket – techadvisor
12 Ways to Upgrade Your Wi-Fi and Make Your Internet Faster – wired